Create a Team
Teams are the core container for content, rosters, and analytics inside VReps. Follow these steps to create a clean workspace that is ready for lessons and plays.
Before You Start
- Confirm you have the Admin or Coach (Manage) role. Only these roles can create teams.
- Gather the roster CSV or list of players you plan to invite.
- Decide whether team communications should default to email, push notifications, or both.
Step-by-Step
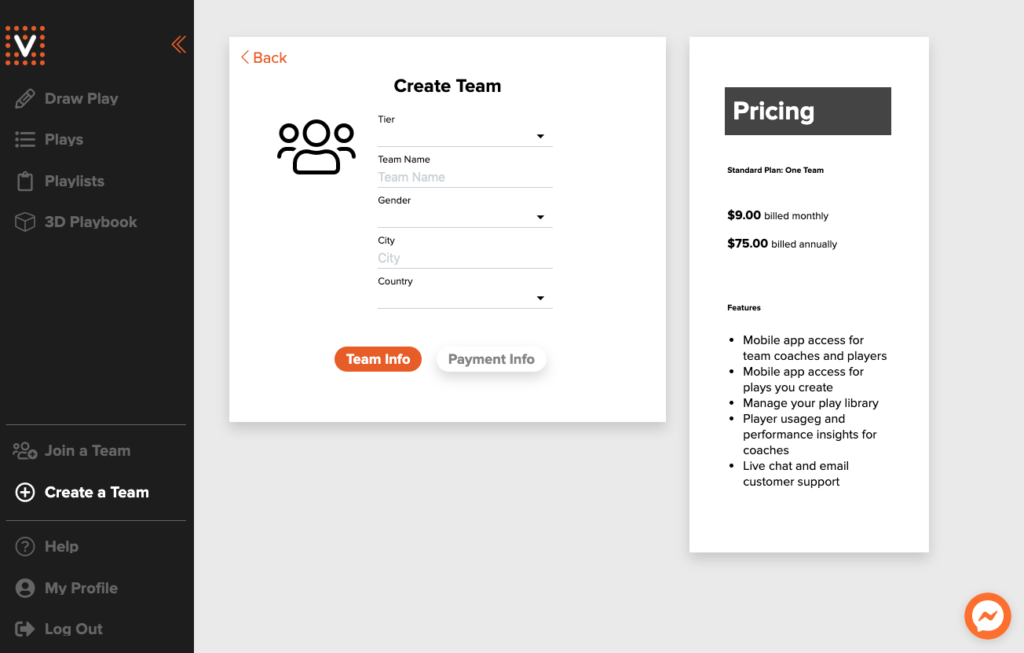
- Navigate to Coach Portal → Teams → Create Team.
- Complete the Team Info panel with level, gender, name, and location.
- Switch to Payment Info to activate the subscription that powers roster sharing and mobile access.
- Confirm the summary view and click Create Team. The dashboard opens to your new team page.
After Creation
- Visit the team profile and click Edit any time you need to change branding, tiers, or staff roles.
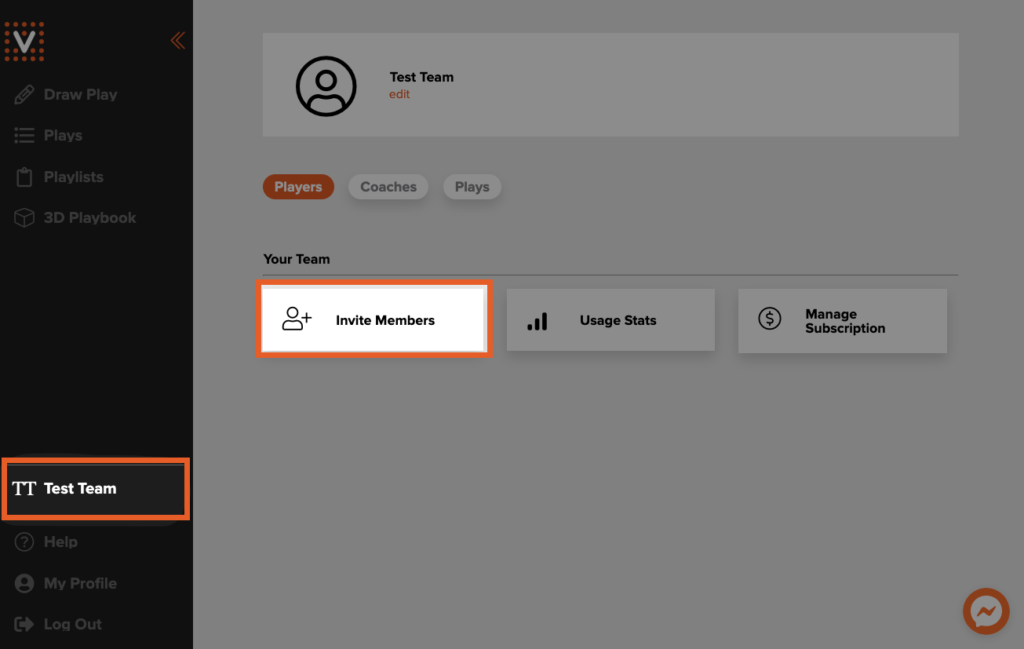
- Generate invite codes from Invite Members to onboard players and assistant coaches.
- Send a welcome announcement under Messages so everyone knows the portal is ready.
Invite Players and Coaches
- On the team page, choose Invite Members.
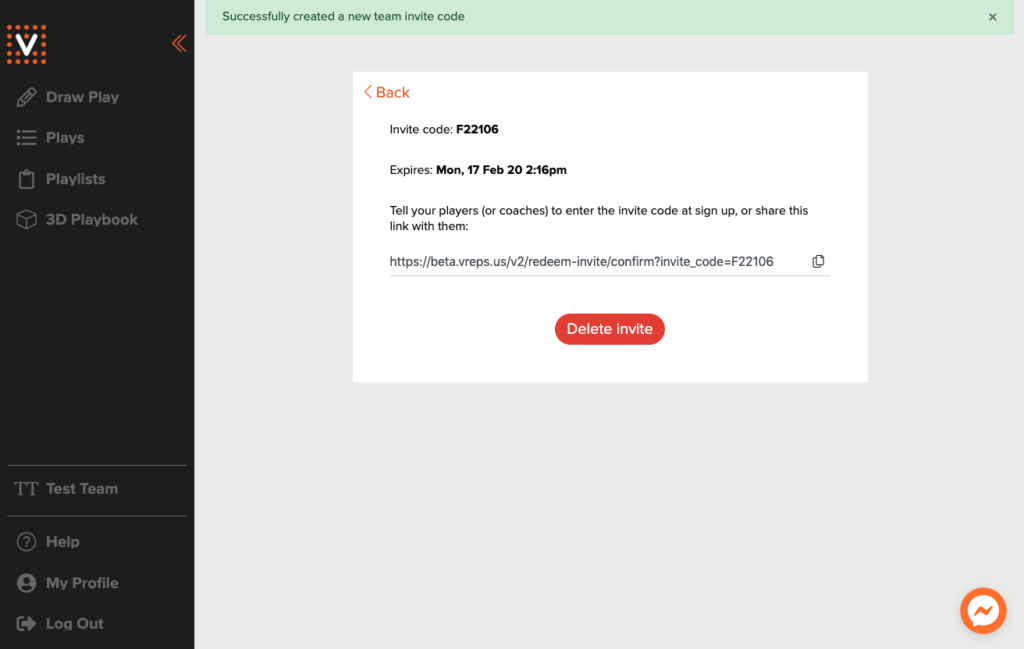
- Select Create new team invite code to generate a shareable link and code.
- Distribute the link via email or team chat. Codes expire after two weeks—create a fresh one if you need more time.
- To revoke access early, delete the invite and issue a replacement code.
Remove Members
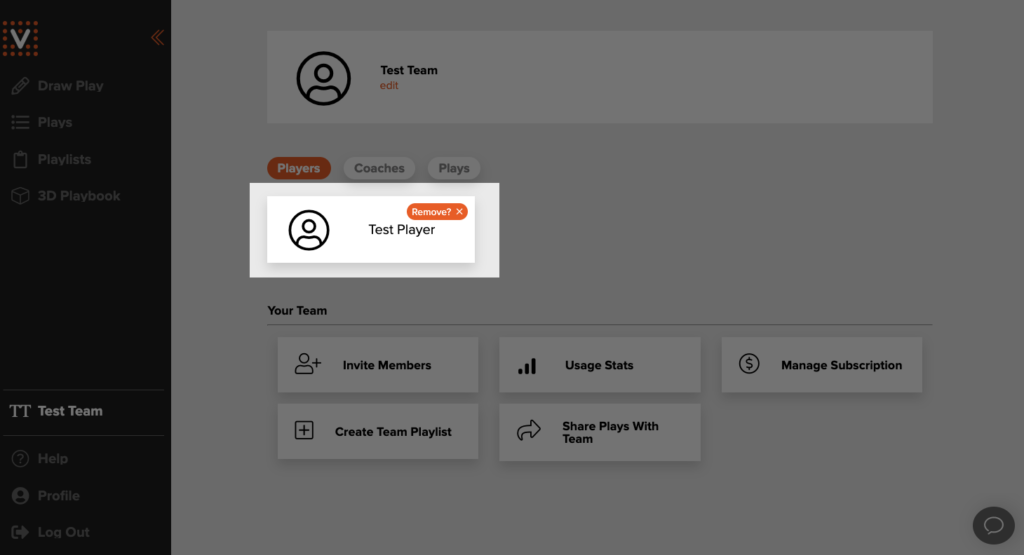
- Navigate to the roster list and click the orange × next to a member’s name.
- Confirm the warning prompt to complete the removal.
Tips & Best Practices
- Use seasons to keep historical data clean. Archive the season when the roster changes significantly.
- Limit the number of admins—one primary, one backup—to avoid accidental content deletions.
- Encourage assistant coaches to use the Contributor role. They can build drafts without publishing live changes.